Camera Motion Rig
Table of Contents
Article written on 29 Oct 2025
Prologue
One of my classes at my university assigned my group to create an electronic device as the final project. Motivated to create a killer, but useful project, I looked through my bin of scrap parts, and I found a linear actuator from an old 3D printer.
The mechanism itself is fascinating to me because there are so many projects that could use it for its simple but precise nature. After pondering what could be the ultimate project to utilize the part, I had a thought about how frustrating it is to capture cinematic video from my camera.
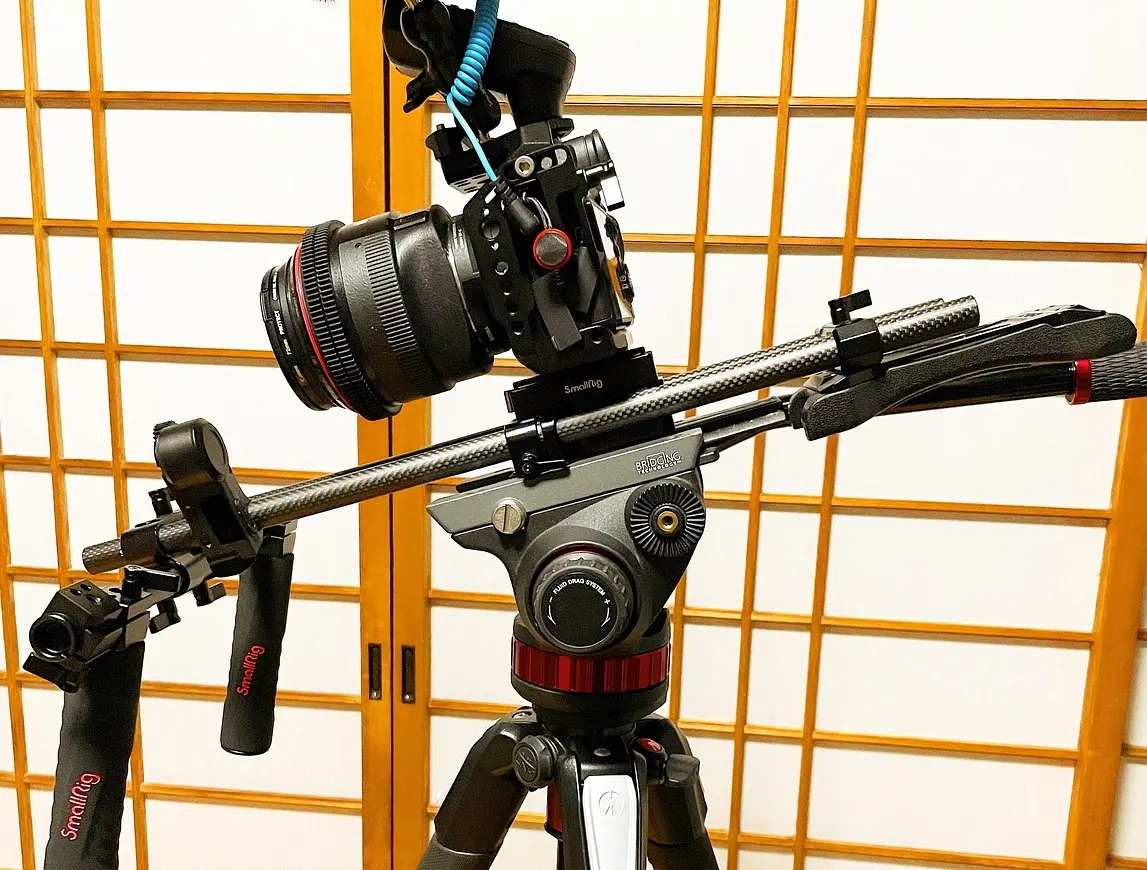
Most high budget films or established YouTubers have expensive camera rigs specifically for creating smooth movements using their camera, and it is often justified because it captures incredible shots, especially for B-Roll or product closeups. Therefore, my partners and I agreed to recycle this part and had created the ultimate low-budget camera rig.
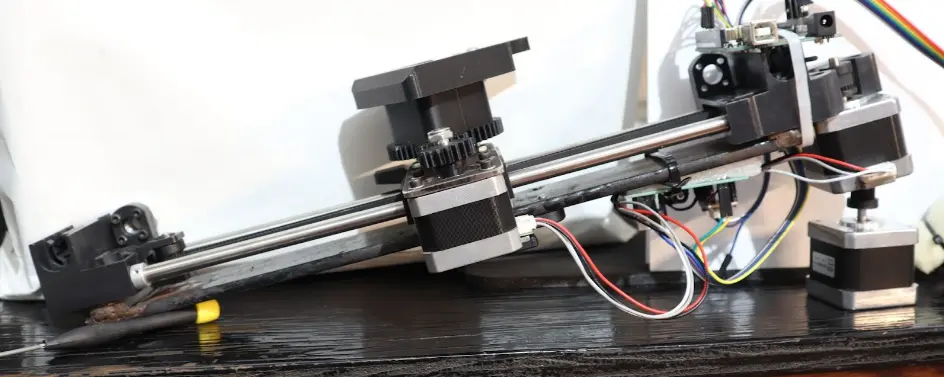
Design
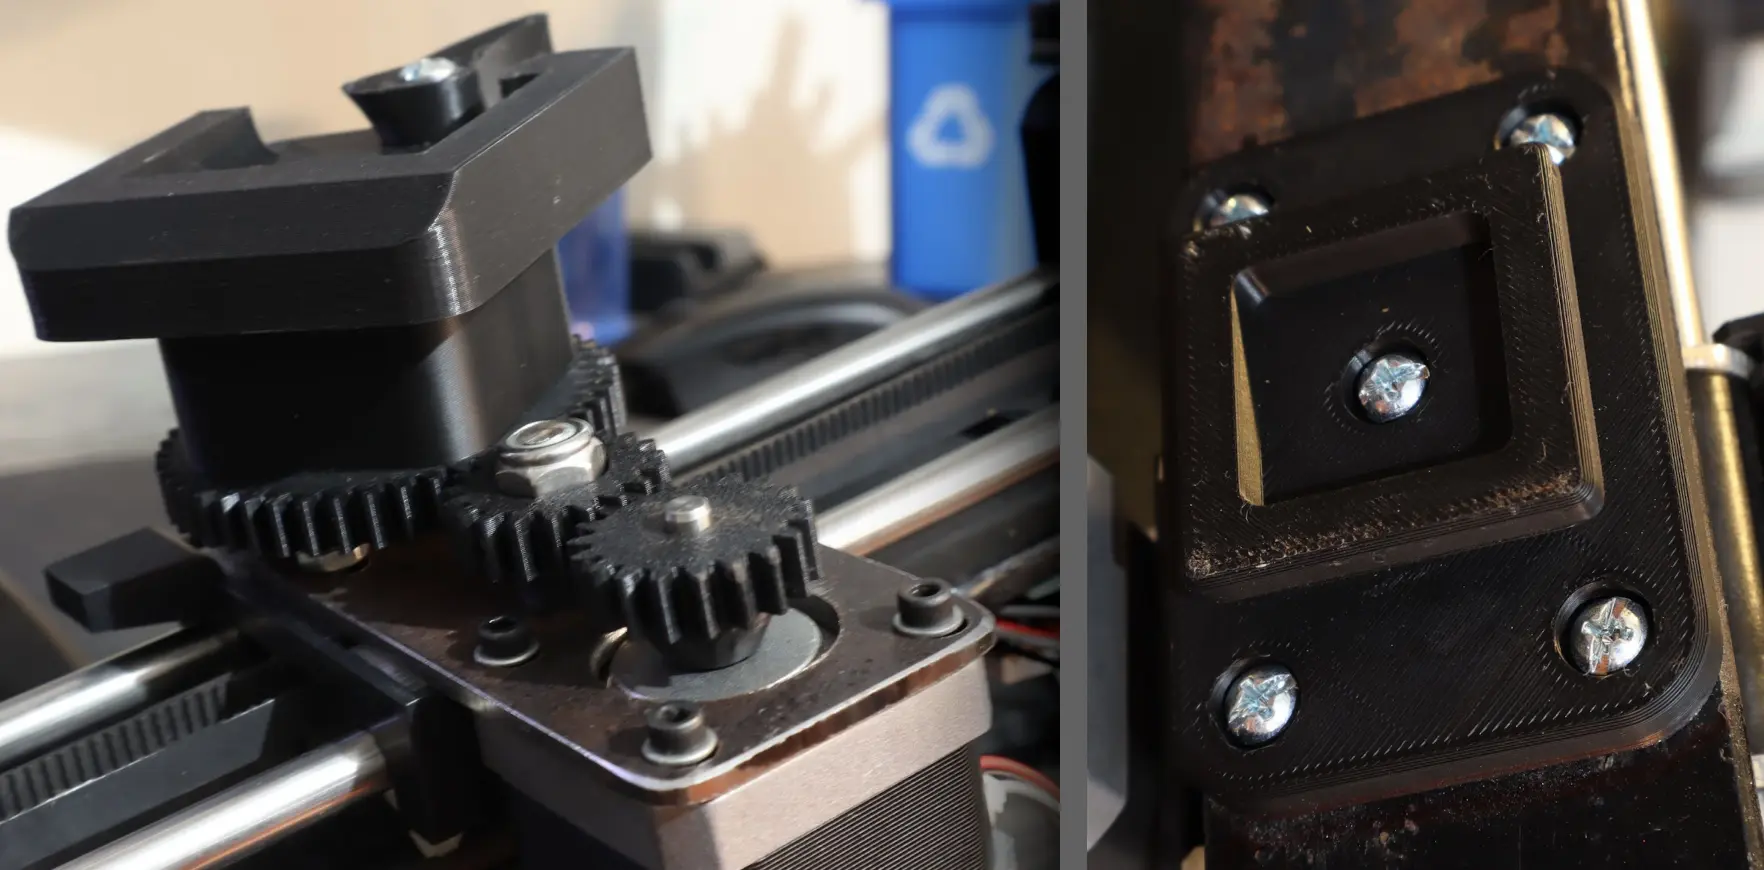
The system is designed like a 2 axis CNC machine that consists of two stepper motors and an Arduino UNO. The platform that moves has a bracket with a custom swivel mechanism that can grasp a standard camera mount, and it uses 3D printed spur gears at 2.42 gear ratio (with an idler gear) to amplify torque of the motor to allow for more precise movements. Finally, the device is designed to be mounted onto a camera tripod so that it can work with standard camera setups.
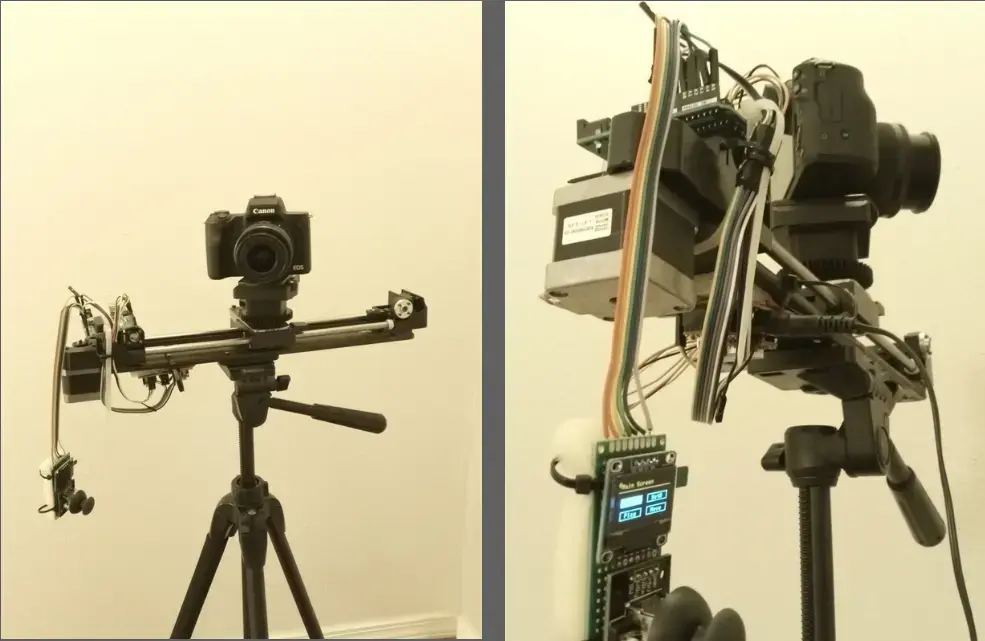
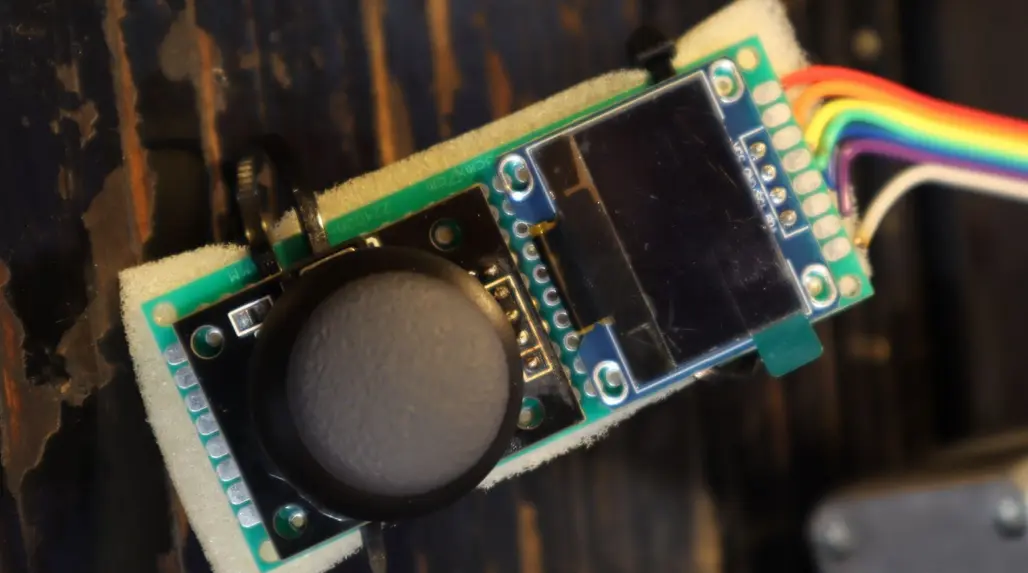
Swivel mechanism with camera mount (left), and standard tripod adapter attached to the bottom (right).
Interface
Attached to the device is a remote that contains a screen and joystick for controlling the rig. The screen is an OLED SSD1306 monochrome display module for showing the user interface where the they can navigate and configure the machine’s movements, or do manual control. For drawing the UI, Adafruit’s GFX library was used to be able to easily draw text, rectangles, and images to the screen using a simple API, and the rendered images are sent through the Arduino’s I2C serial bus.
Driving the Stepper Motors
To control the stepper motors, it uses two A4988 drivers that automatically sends the required sequence of signals to the motors, capable of micro-stepping (for smoother operation) and current limiting (preventing motors from burning up). These circuits are soldered onto a purfboard for creating a reliable prototyped circuit.
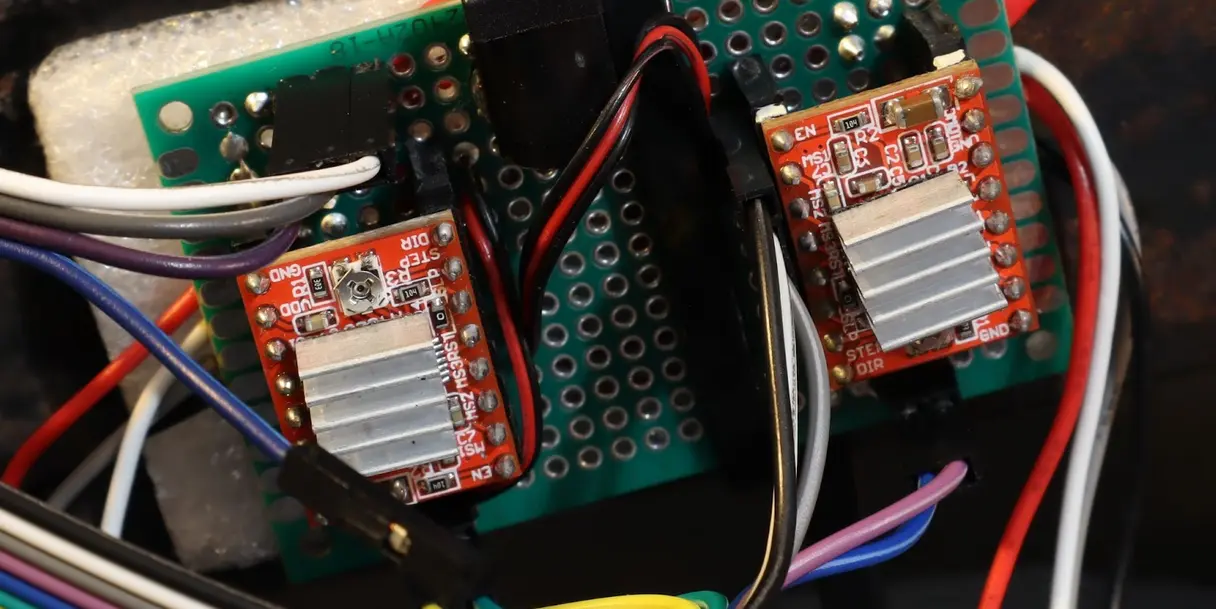
These drivers require pulses to generate the steps, and these pulses occur at varying frequencies to control the speed of the motor. Therefore, the Arduino UNO is configured to use two hardware timers, Timer1 (a 16bit timer), and Timer2 (a 8bit timer). These timers, once configured, are able to output a pulse at a specific frequency for controlling the speed. A direction signal is also sent to control the rotation direction of each step.
How to Use
There are two set-points to control the movement, A (the starting position) and B (the ending position). Once configured, playback can start and the camera will interpolate between the two points with the given duration. Furthermore, the “Move” menu enables the user to move the machine manually with the joystick.
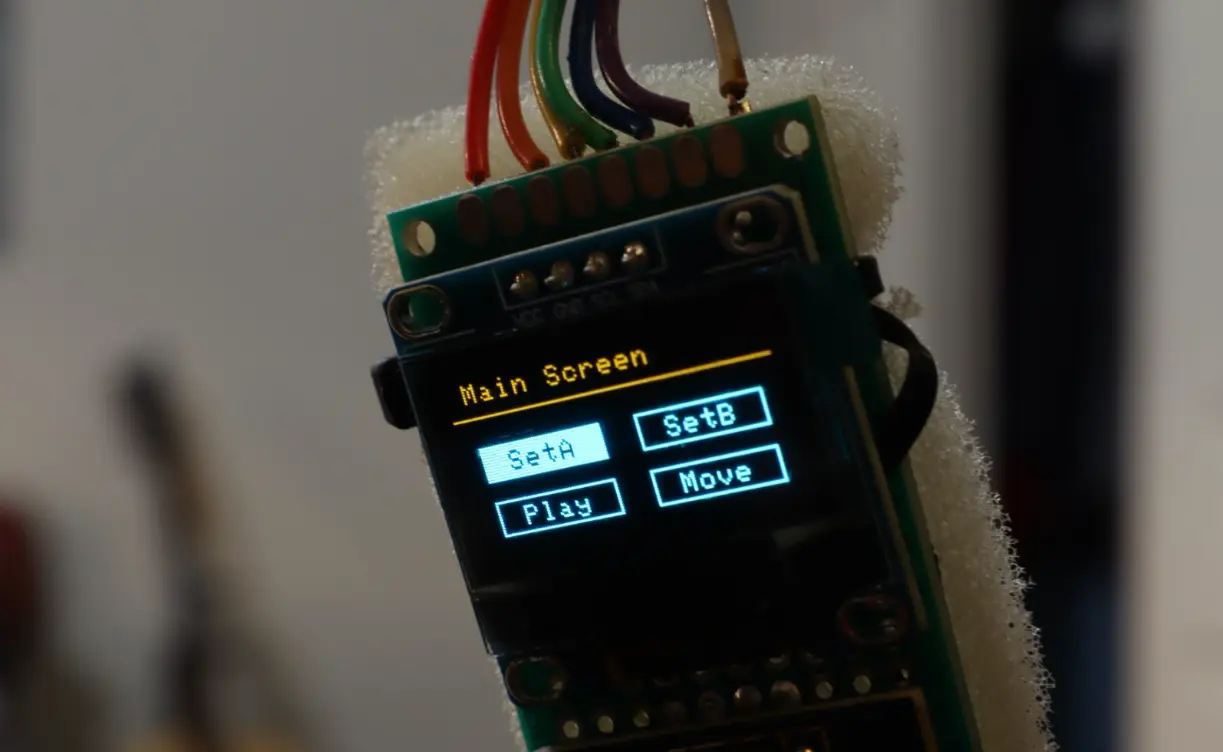
The main menu of the interface to select editing of set-points, starting playback, or manual control.
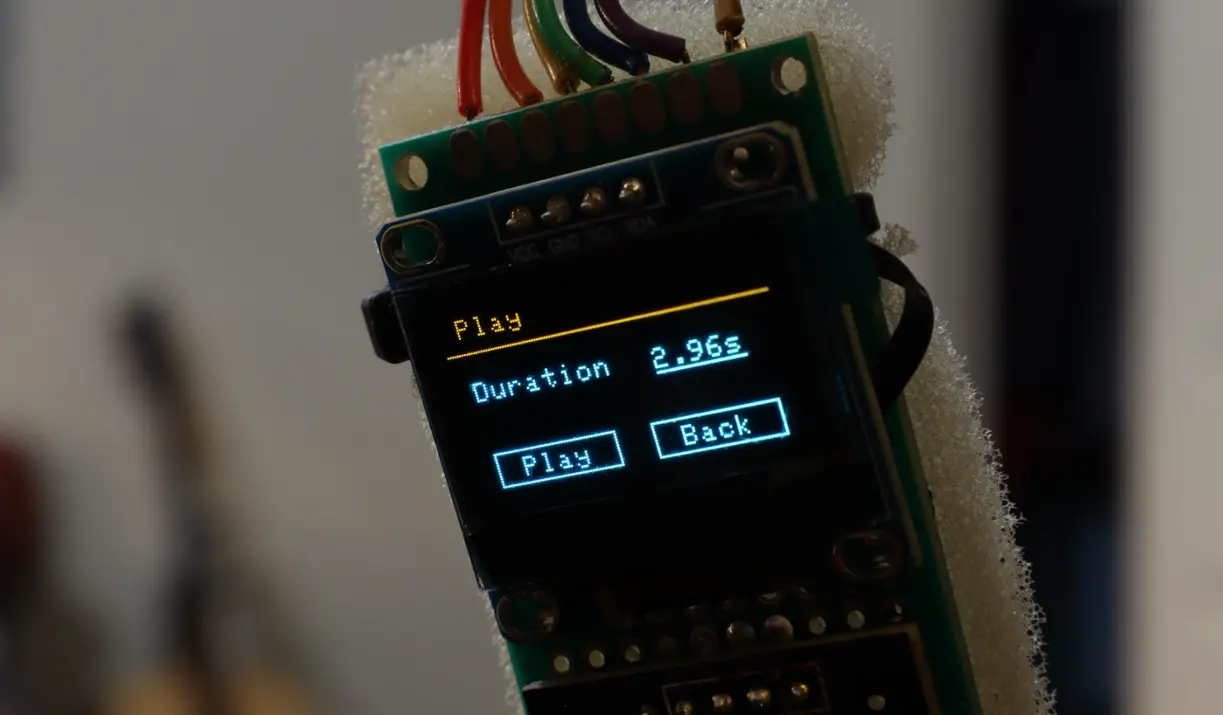
The “Play” menu giving the user the option to set the duration.
Results
I was honestly surprised that the Arduino UNO was able to draw the user interface, calculate smooth movements, handle inputs, and control two motors all at the same time given that it is a rudimentary microcontroller compared to, for example, the ESP32. Regardless, the finished project worked wonderfully. Take look at the footage it can capture:
Overall, I am very impressed with the smooth movements this project offers. While it may look a little jittery (if you look close enough), it can be fixed by replacing the spur gears of the swivel machanism with a belt drive for smoother transfer of power. This can be done in the future, but I am still quite happy with the project since it works well enough for my use case.
Credits
Stock photos are sourced from pixabay.com.